TouchDesigner is a powerful visual programming environment for building interactive multimedia systems. Integrating various sensors allow interesting user experiences to be created. There are a number of ways to interface with TouchDesigner and they include serial, MIDI, OSC, TCP, websockets, amongst many others. In this post we use the newly added MQTT features of TouchDesigner 099 to obtain sensor data from the PiShield and use it to control live video processing. By using MQTT not only do we eliminate the need for end to end definitions of the connections, but also open up the use of many existing IoT platforms and devices. Although MQTT was designed for “high latency” and “unreliable” networks, by utilizing a QOS value of 0 (“at least once”, with no acknowledgement), it is possible to obtain relatively fast sensor streaming rates on a local network, effectively identical to UDP streams in terms of performance. Our informal tests thus far have shown that up to 100Hz rates can be easily achieved with around 5ms of roundtrip latency over a wireless, local network with the broker and sensor interface running on the Raspberry Pi.
Software Configuration
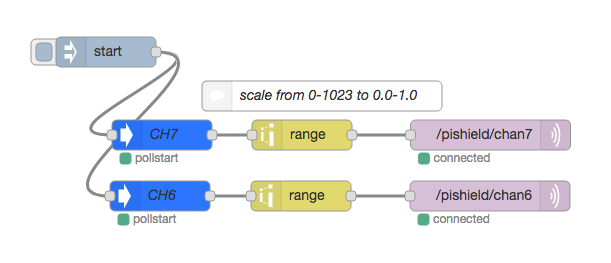
In this example, we assume that you are familiar with MQTT, and have set up a broker on the Raspberry Pi. (For more details, check out the basic MQTT tutorial). We will make use of node-red to obtain and On the PiShield side, we create a simple node-red flow that publishes two channels of sensor data, as follows:
MQTT Configuration in TouchDesigner
In TouchDesigner, we need the following components:
- An MQTT Client DAT which allows connection to the broker
- A Table DAT which holds the stored values*
- Various objects for converting and using the data from the table.*
*note: while it would be possible to directly set the output effect’s parameters in the script to achieve the end result, in this example we go through the process of using various OPerators to expose the values so that they can be processed and mapped visually.
We start by adding the MQTT DAT and configuring it. On the right you see the network address of the MQTT broker (in this case, running on the Raspberry Pi), and then we hook up the callbacks script for subscribing to and receiving messages on different topics:
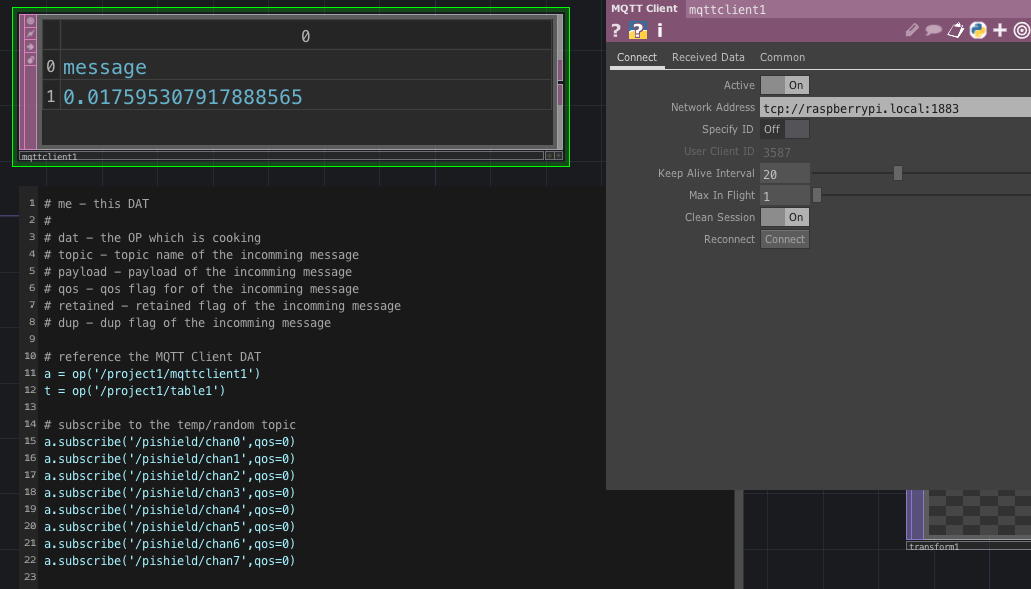
In this case each PiShield sensor is publishing to a separate channel, so we subscribe to all of them. (Only 6 and 7 are used in this example, as you can see in the node-red flow above).
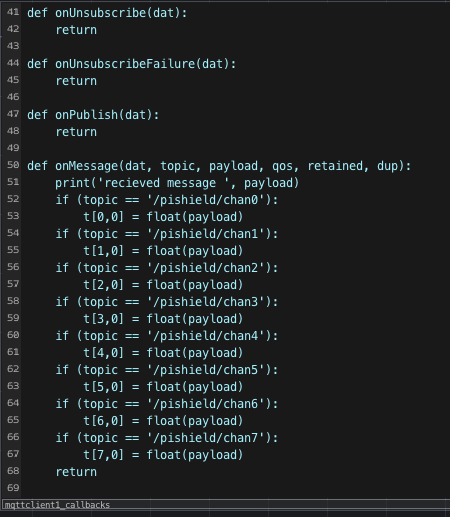
From the onMessage callback at the bottom of the script, we place the incoming sensor data into the corresponding location of the table DAT by setting the appropriate row.
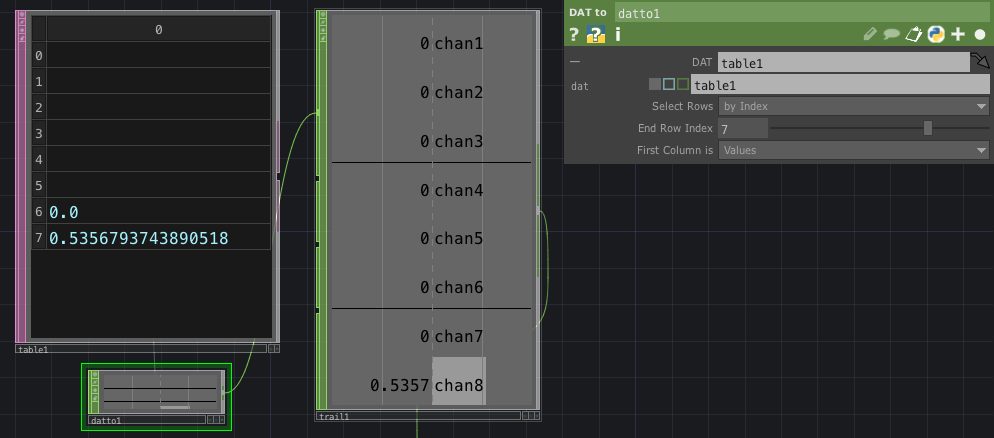
We should see the table’s last two rows update with our sensor data once the MQTT client DAT is connected:
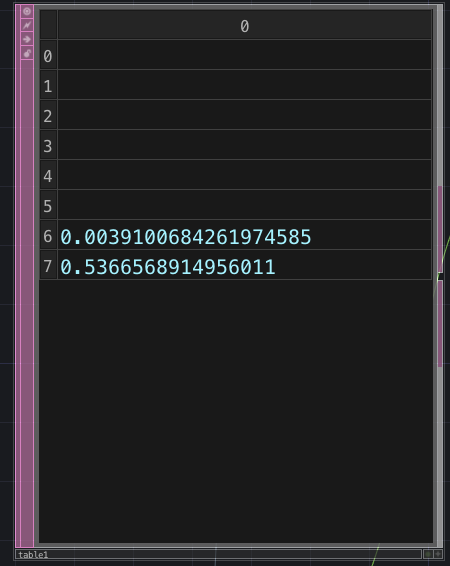
Note that only the 6th and 7th slots are being updated, since these are the only channels we’re publishing to from the node-red flow.
Next, we use a DAT To to convert the table data to a CHannel OPerator (CHOP), and display it via a trail. Here we can see each row of the table being converted into 8 channels.
Finally, we use two mathCHOPs that perform some signal scaling before exporting each channel’s sensor value to various transform parameters. See this tutorial on how to export parameters between OPerators in TouchDesigner.
The first math CHOP scales the values by 0.5 for the x translation parameter, while the second converts the input value to 0-360 (degrees) for rotation.
![]()
The complete TouchDesigner (.toe) project file can be downloaded here and this is what it looks like in action:
In this case, we have a Push and Touch sensor mapped to the translation and rotation, creating the result shown above.
We only use two channels of sensor data in this example, but hopefully it should be clear how extra channels of sensors (if available) can be added.
Pingback: ESP8266でTouchDesigner099のMQTT Client DATを試してみた。 - IT記事まとめ